Social Media Content Calendar Google Sheets Template
Key takeaways
- A working Google Sheets content calendar needs 10 columns, two dropdowns, and a conditional color rule, and takes about 15 minutes to build.
- The Status column with grey-yellow-green conditional formatting is what keeps the calendar alive past week two.
- Batch one 30-minute session per week to generate and schedule a full week of posts instead of filling 14 rows at once.
- Google Sheets is the plan, not the poster; you still need a scheduler or manual posting to publish to TikTok, Reels, and YouTube Shorts.
- Three posts per week is a sustainable floor for a business with no marketing staff; daily posting works if you batch videos in one sitting.
You can build a working social media content calendar Google Sheets template in about 15 minutes, fill it with short-form videos you never have to edit, and hand it straight to a scheduler. This guide walks through the exact columns, a copy-paste weekly layout, and the handoff from sheet to scheduler.
Ten columns, and the ones to skip
The 10 columns that matter
| Column | What goes in it |
|---|---|
| Date | The day the post goes live |
| Platform | Instagram Reels, TikTok, or YouTube Shorts |
| Status | Dropdown: Idea, Scripted, Generated, Scheduled, Posted |
| Hook | The first line, written out |
| Script | The full 30-60 second script |
| Asset link | URL of the generated video |
| Caption | Post copy plus hashtags |
| Owner | You or a staff member |
| Scheduled time | Exact posting slot |
| Notes | Results, reshoot reminders |
Build Status and Platform as dropdowns using data validation in Google Sheets, so a tap on a cell sets the state instead of typing.
Columns that look useful but waste your time
Skip columns for engagement metrics, thumbnail drafts, and approval chains. With no marketer on payroll, nobody updates them after week one. Keep the calendar about production and scheduling; track performance inside TikTok and Instagram analytics instead, and let a scheduler like VideoContent's social media video scheduler handle the posting slot for you.
Build it in 15 minutes
Step 1-3: structure and dates
Open a blank sheet and name it "Calendar". In row 1, add these headers: Date, Day, Platform, Topic, Hook, Video link, Status, Notes. In A2, type today's date, then in A3 enter =A2+1 and drag down 60 rows. That gives you two months of dated rows in one drag. Column B gets =TEXT(A2,"ddd") so you can see which days are your busy ones.
Step 4-6: dropdowns, status colors, weekly view
Select the Platform column, then Data > Data validation > Dropdown, and list TikTok, Reels, Shorts. Do the same for Status with the values Idea, Scripted, Posted. Select the Status column, open Format > Conditional formatting, and color Idea grey, Scripted yellow, Posted green. Now a glance down the column tells you how far behind you are.
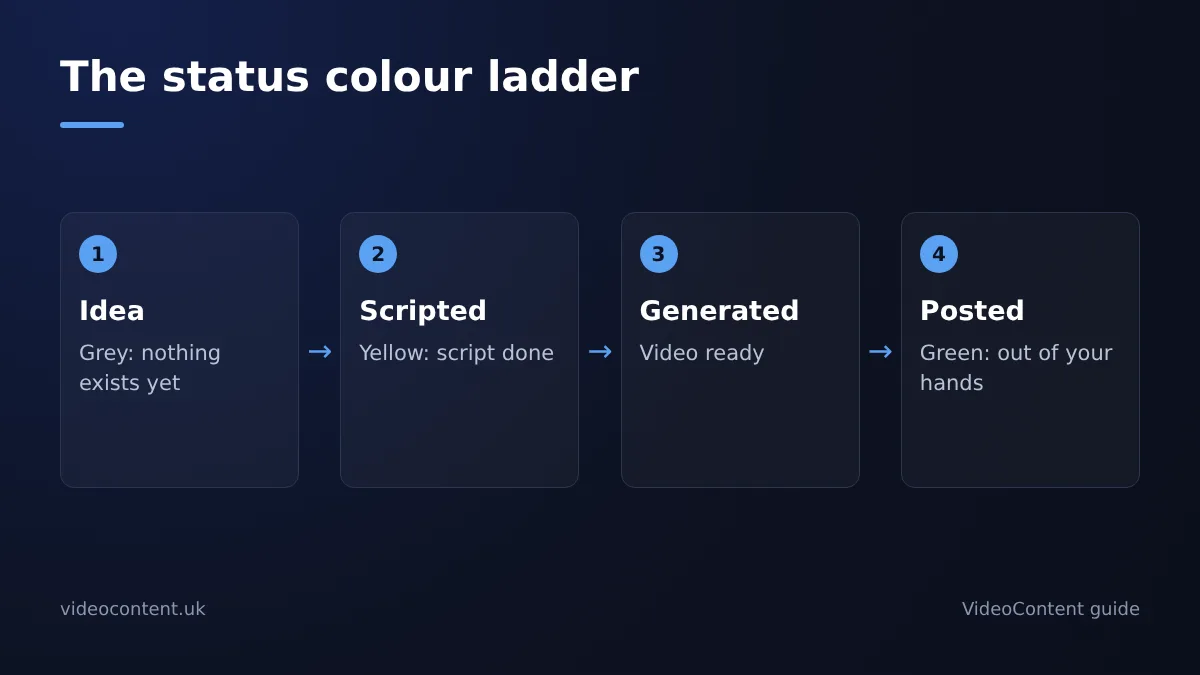
The Status column is the part most people skip, and it is the part that keeps the calendar alive past week two. A calendar full of dates and topic ideas is just a wish list. What changes your behavior is opening the sheet every Monday and seeing eight grey cells in a row, because grey means nothing exists yet, yellow means a script is done and only the video is missing, and green means it is out of your hands. That color ladder turns a planning document into a production line: you can see exactly which stage each video is stuck at, and you fix the stage with the most grey, not the one you enjoy most. Without it, week two always collapses back into posting whatever you remember to film that morning.
For the weekly view, add a filter on the Day column or just freeze row 1 and scroll by week. If you want the videos themselves generated rather than scripted, that is what VideoContent handles, and the handoff is covered later in this guide.
Filling the calendar with video
You generate it with an AI short-form video generator, then paste the finished file link straight into the calendar's "asset" column the same day. VideoContent is built for this job: describe the video in a sentence and it writes the script, captions, and hashtags, and on Pro it renders the vertical video with a voiceover in under 60 seconds. Free covers 3 script generations with no credit card; finished videos start on Pro at $19/month and scheduled posting on Pro+ at $39/month (plans). Batch a week's worth in one sitting on Sunday, then slot one per day into the sheet.
Generating vertical video from your hooks
Work from your calendar's hooks column, not a blank screen. Type the hook as your prompt: "3 signs your gym membership is wasting money." The output is already 9:16, captioned, and ready for TikTok, Reels, or YouTube Shorts, so there is no editing step to avoid.
Honest limits of AI-generated video
The videos use stock footage and templates, not your actual gym, salon, or kitchen. Post them as filler between real phone-shot clips, and expect the voiceover to need a re-roll occasionally. If you want tool-generated captions on footage you filmed yourself, CapCut or Submagic (https://www.submagic.co) handle that better.
From sheet to scheduler
Your spreadsheet is the plan. Posting still needs a tool that talks to TikTok, Reels, and YouTube Shorts, and that handoff is the step most calendar guides skip.
Option A: manual copy into a scheduler
Export your sheet as CSV, import it into a scheduler like Later or Buffer, and check that captions, hashtags, and dates landed in the right fields. This works, but expect cleanup: CSV imports routinely mangle line breaks in captions, and you'll fix dates by hand. Budget 30 minutes per week for a 7-post calendar.
Option B: generate and schedule in one tool
Skip the export entirely. In VideoContent on the Pro+ plan, you generate the vertical video, captions, and hashtags in one session, then schedule it from the same dashboard, so the calendar row and the queued post are the same object. For a med spa pushing treatment explainers three times a week, that cuts the workflow to: pick a slot, generate, schedule.
The honest trade-off: Option A keeps your calendar tool-agnostic and free, but you do the copying. Option B means your plan lives inside one vendor, so if pricing jumps you're rebuilding the calendar elsewhere. If you're posting daily, B wins on time. If you post three times a week, A is fine.
Why Sheets beats Notion and Trello here
For a 1-10 person business, Sheets wins on one thing: the owner and any part-timer already know it, and the AI video generator you're pasting from lives in a browser tab anyway.
Notion and Trello are better at dragging a post from "idea" to "posted," and both are free for small teams. They lose on the one job a calendar does weekly: scanning a grid of 7-14 rows by date and platform. That is literally what a spreadsheet shows and a kanban board hides.
Where Sheets honestly falls short: no reminders, no approval states, and no media previews, so a video sits as a bare URL until you open it. Tools like OpusClip handle the clip-repurposing step on their own site, not inside your sheet, so plan for that handoff either way.
One filled-in week
Example week: a restaurant's 7 posts
Here's one filled-in week for a 40-seat restaurant, using the columns from the build section: Day, Platform, Hook, Asset, Status.
- Mon — TikTok. Hook: "The $14 lunch special nobody orders (and should)." Asset: faceless clip over b-roll of the dish, captions on. Status: Scheduled.
- Tue — Instagram Reels. Hook: "3 minutes to our best-selling pasta." Asset: time-lapse from the kitchen phone. Status: Scheduled.
- Wed — YouTube Shorts. Hook: "How we pick produce at 5am." Asset: voiceover over market footage. Status: Draft.
- Thu — TikTok. Hook: "Reply to @jess: is the tiramisu actually made here?" Asset: 20-second answer clip. Status: Draft.
- Fri — Instagram Reels. Hook: "Weekend tables: 4 left." Asset: reservation-screen recording with captions. Status: Scheduled.
- Sat — TikTok. Hook: "Saturday 8pm rush, unedited." Asset: raw kitchen clip. Status: Idea.
- Sun — Instagram Reels. Hook: "Sunday prep for the week." Status: Idea.
Notice the pattern: three scheduled before Monday, two drafted, two ideas. Hooks do the heavy lifting; none of these clips need editing skill, just a phone and captions.
Keeping it alive after week two
Most calendars die because filling 14 rows at once feels like homework. Batch instead: one 30-minute session generates a week of videos, drops them into the sheet, and schedules them. Then hold a fixed weekly review, same day, 30 minutes, where you check three columns only: what posted, what got saves or shares, what slot is empty.
Reuse what worked before you invent anything new. A hook that earned saves on Reels usually works again with a different offer or location. Instagram's own guidance points creators toward consistent posting over volume (Instagram Help Center), so consistency beats ambition.
Where VideoContent falls short: it will not tell you which topics your audience wants. Your review session has to supply that judgment.
When free stops being enough
The template plus free tools covers the first month: VideoContent's free plan gives you 3 script generations with no credit card, and you film and post manually from your phone. If you batch on Sunday and post daily, that works for a while.
Upgrade when manual posting breaks. If you're spending 20 minutes a day copying files and pasting captions into TikTok, Instagram, and YouTube Shorts, that's roughly 10 hours a month. Pro at $19/month renders the videos for you, and Pro+ at $39/month adds scheduled posting, which is what recovers that time.
Honest math: a paid plan only pays for itself if you actually post daily. If you're at three Reels a week, stay free and keep the calendar as your single source of truth.